| |
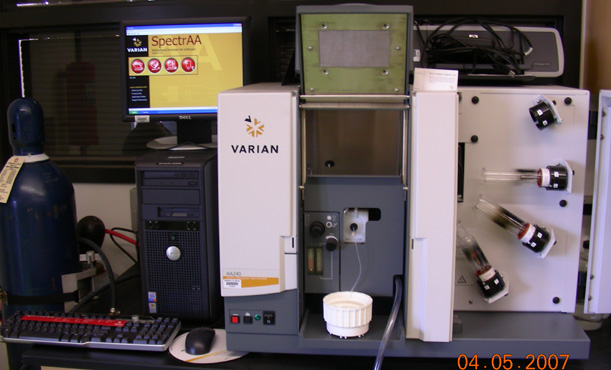
AA240 Spectrophotometer at Miramar College
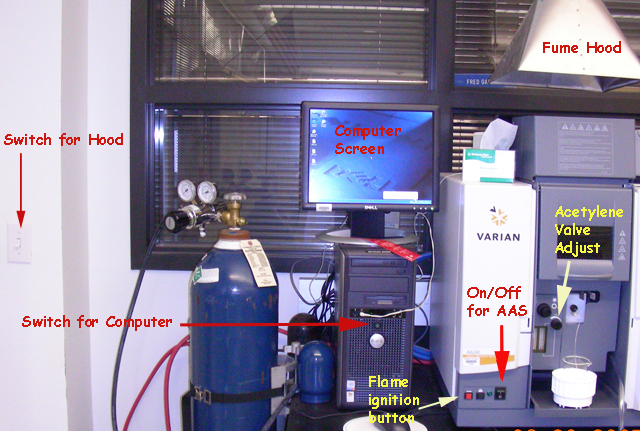
Features of the Varian AA240 spectrometer
|
| |
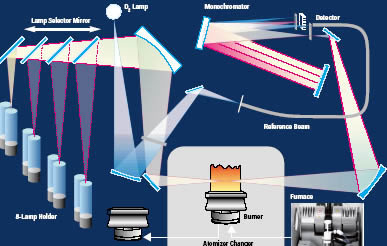
Basic Design of an Atomic Absorption Spectrometer
|
| |
Preparing Instrument for Operaton
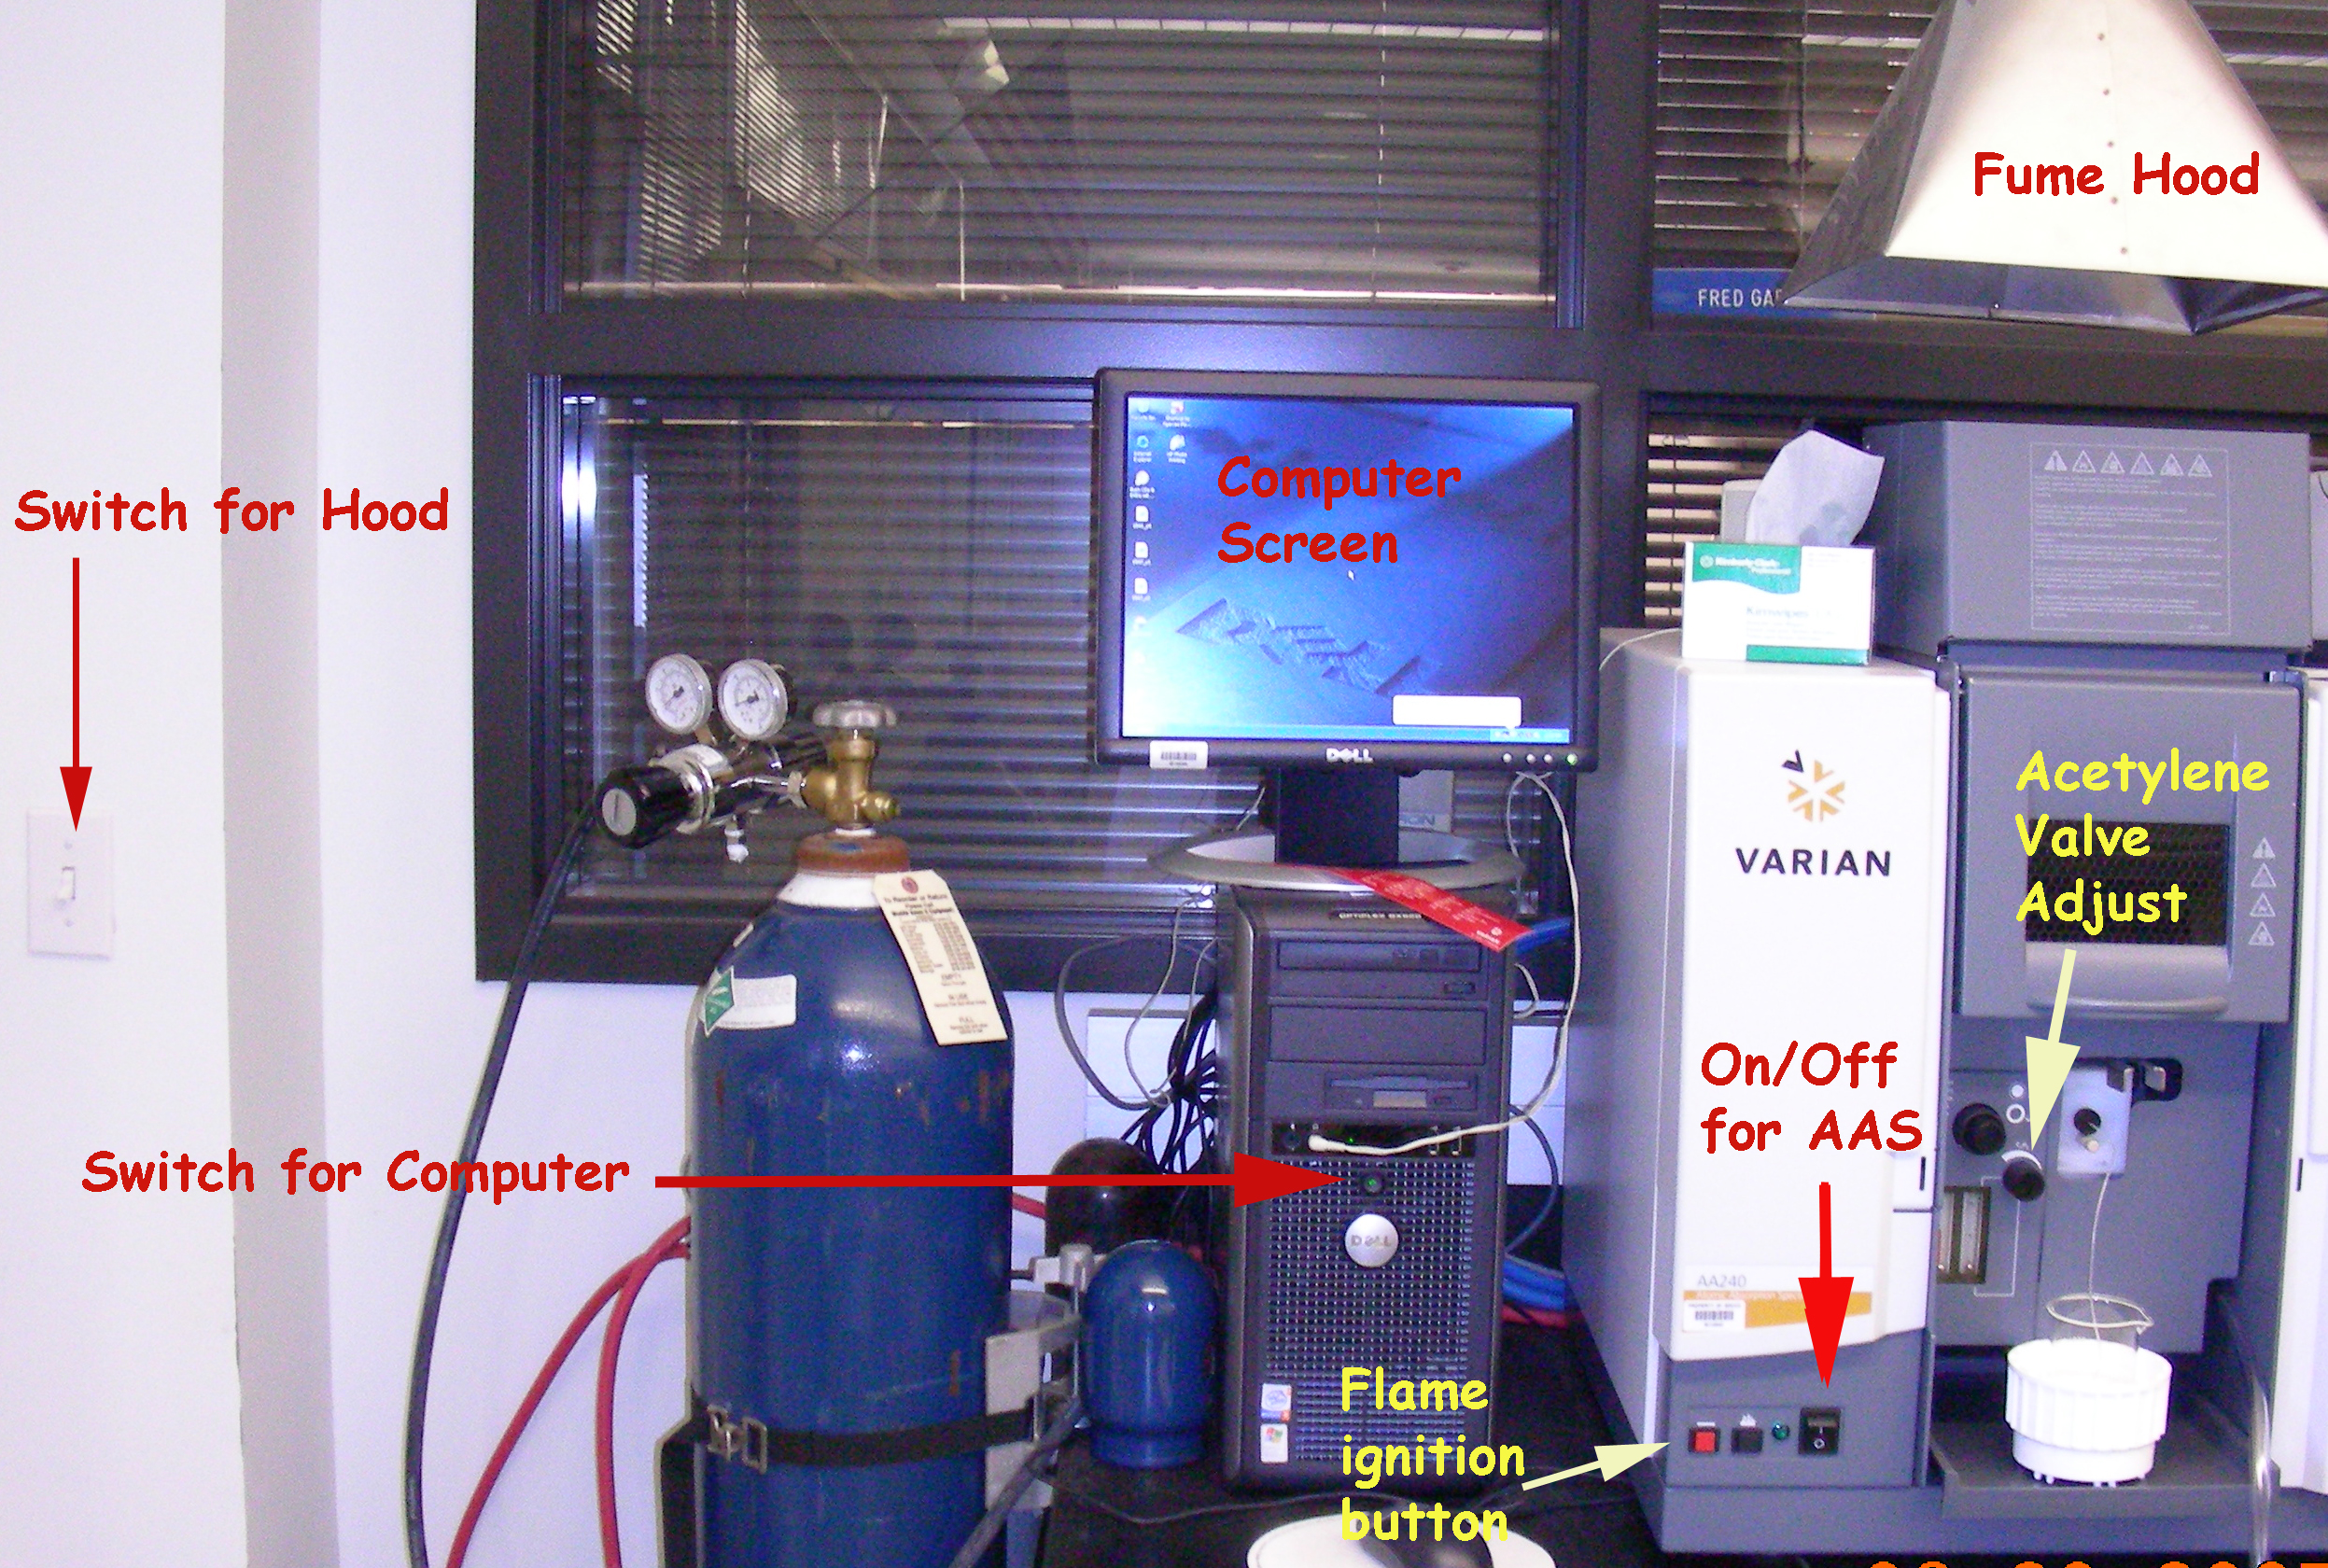
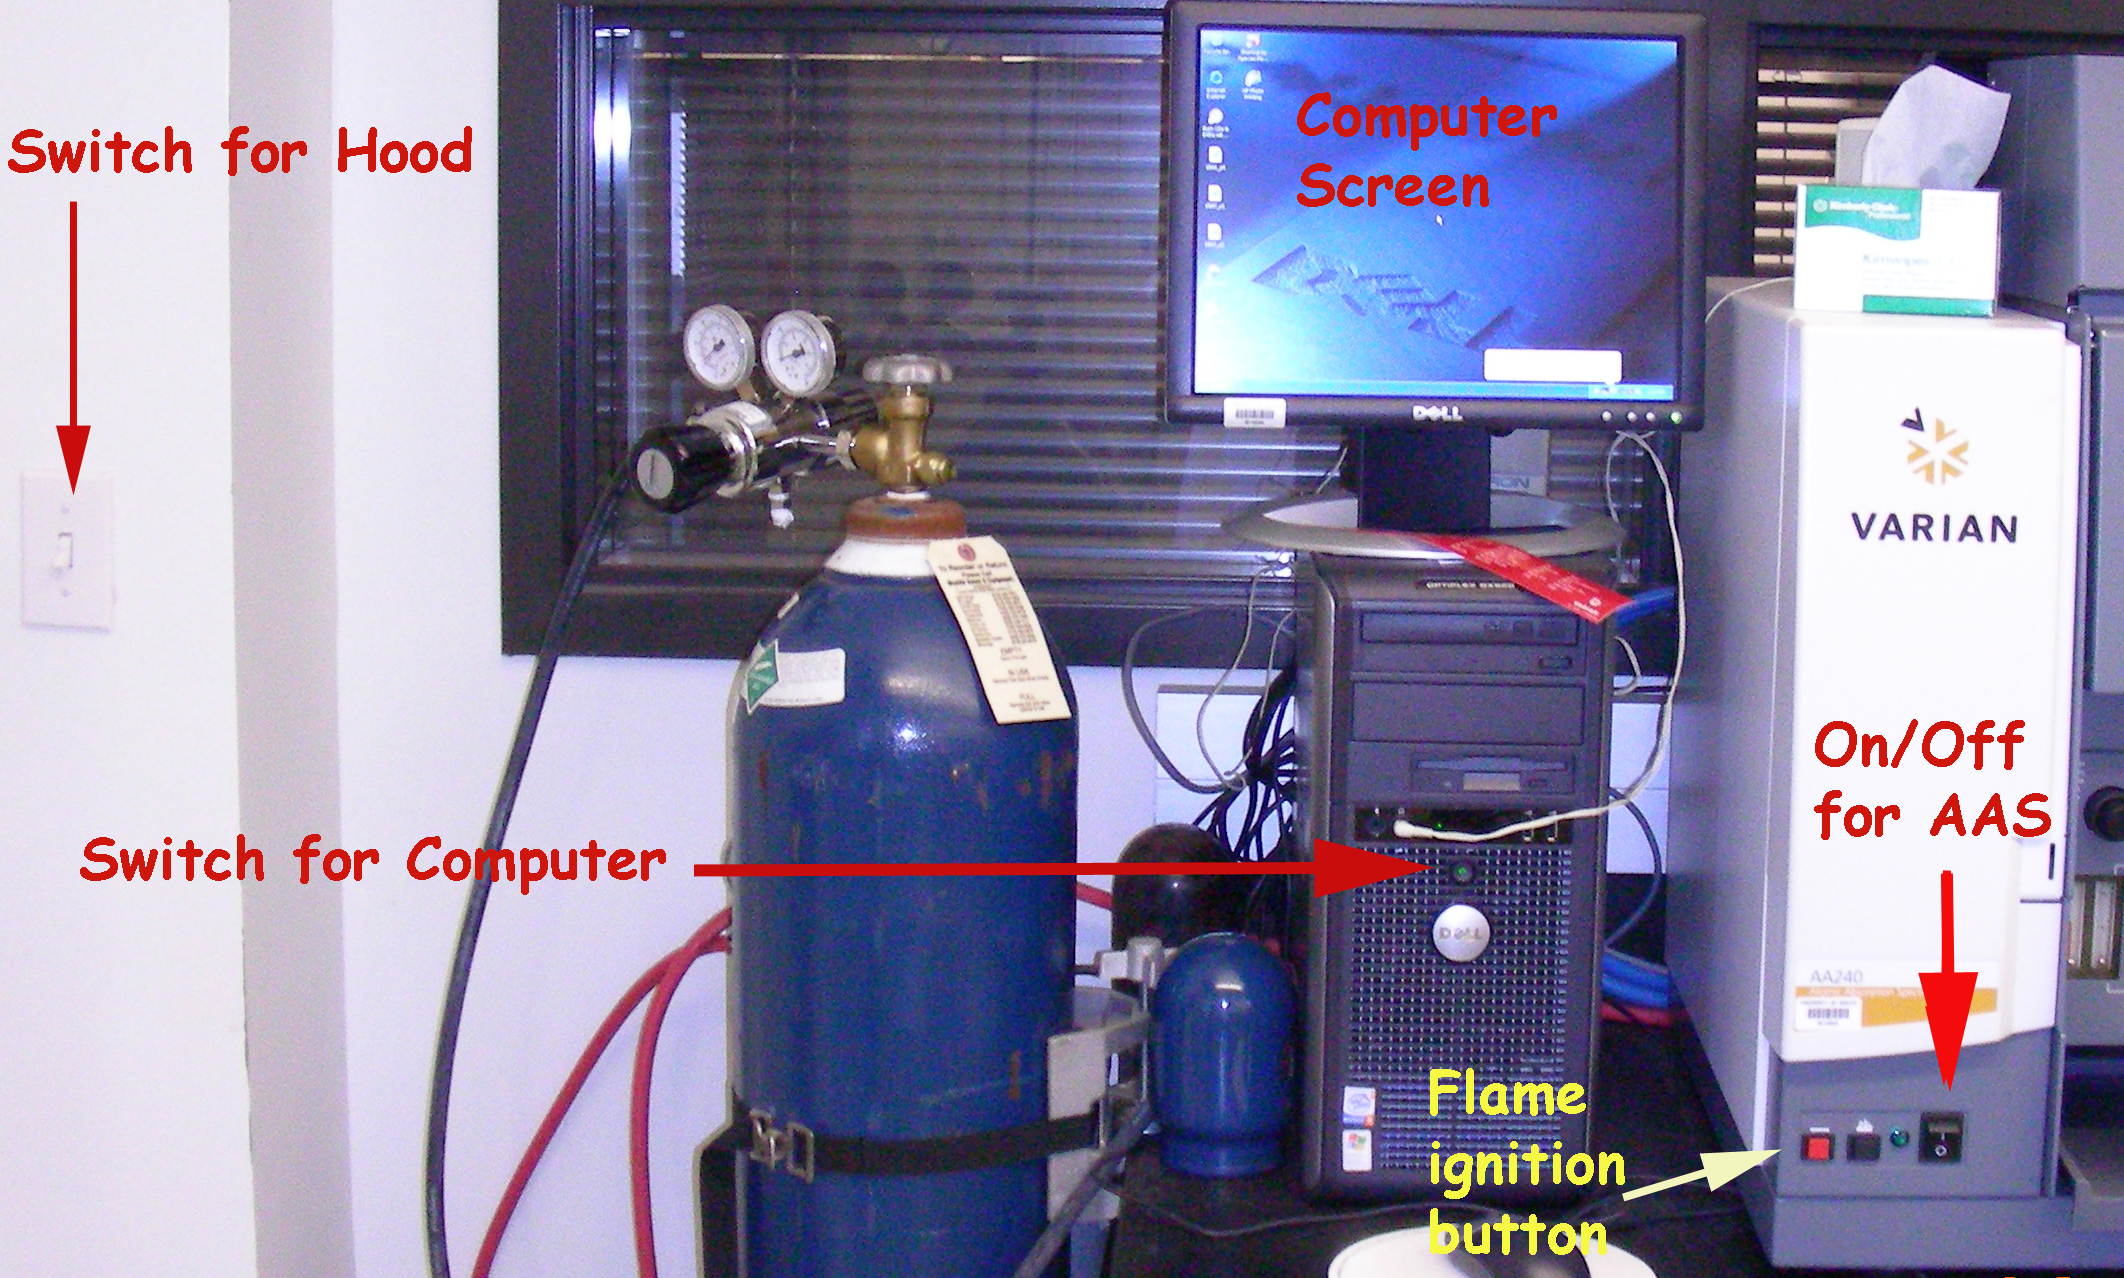
Flip the switch to turn on the fume hood above the spectrometer
Turn on the instrument by pressing the power button on the computer
|
| |
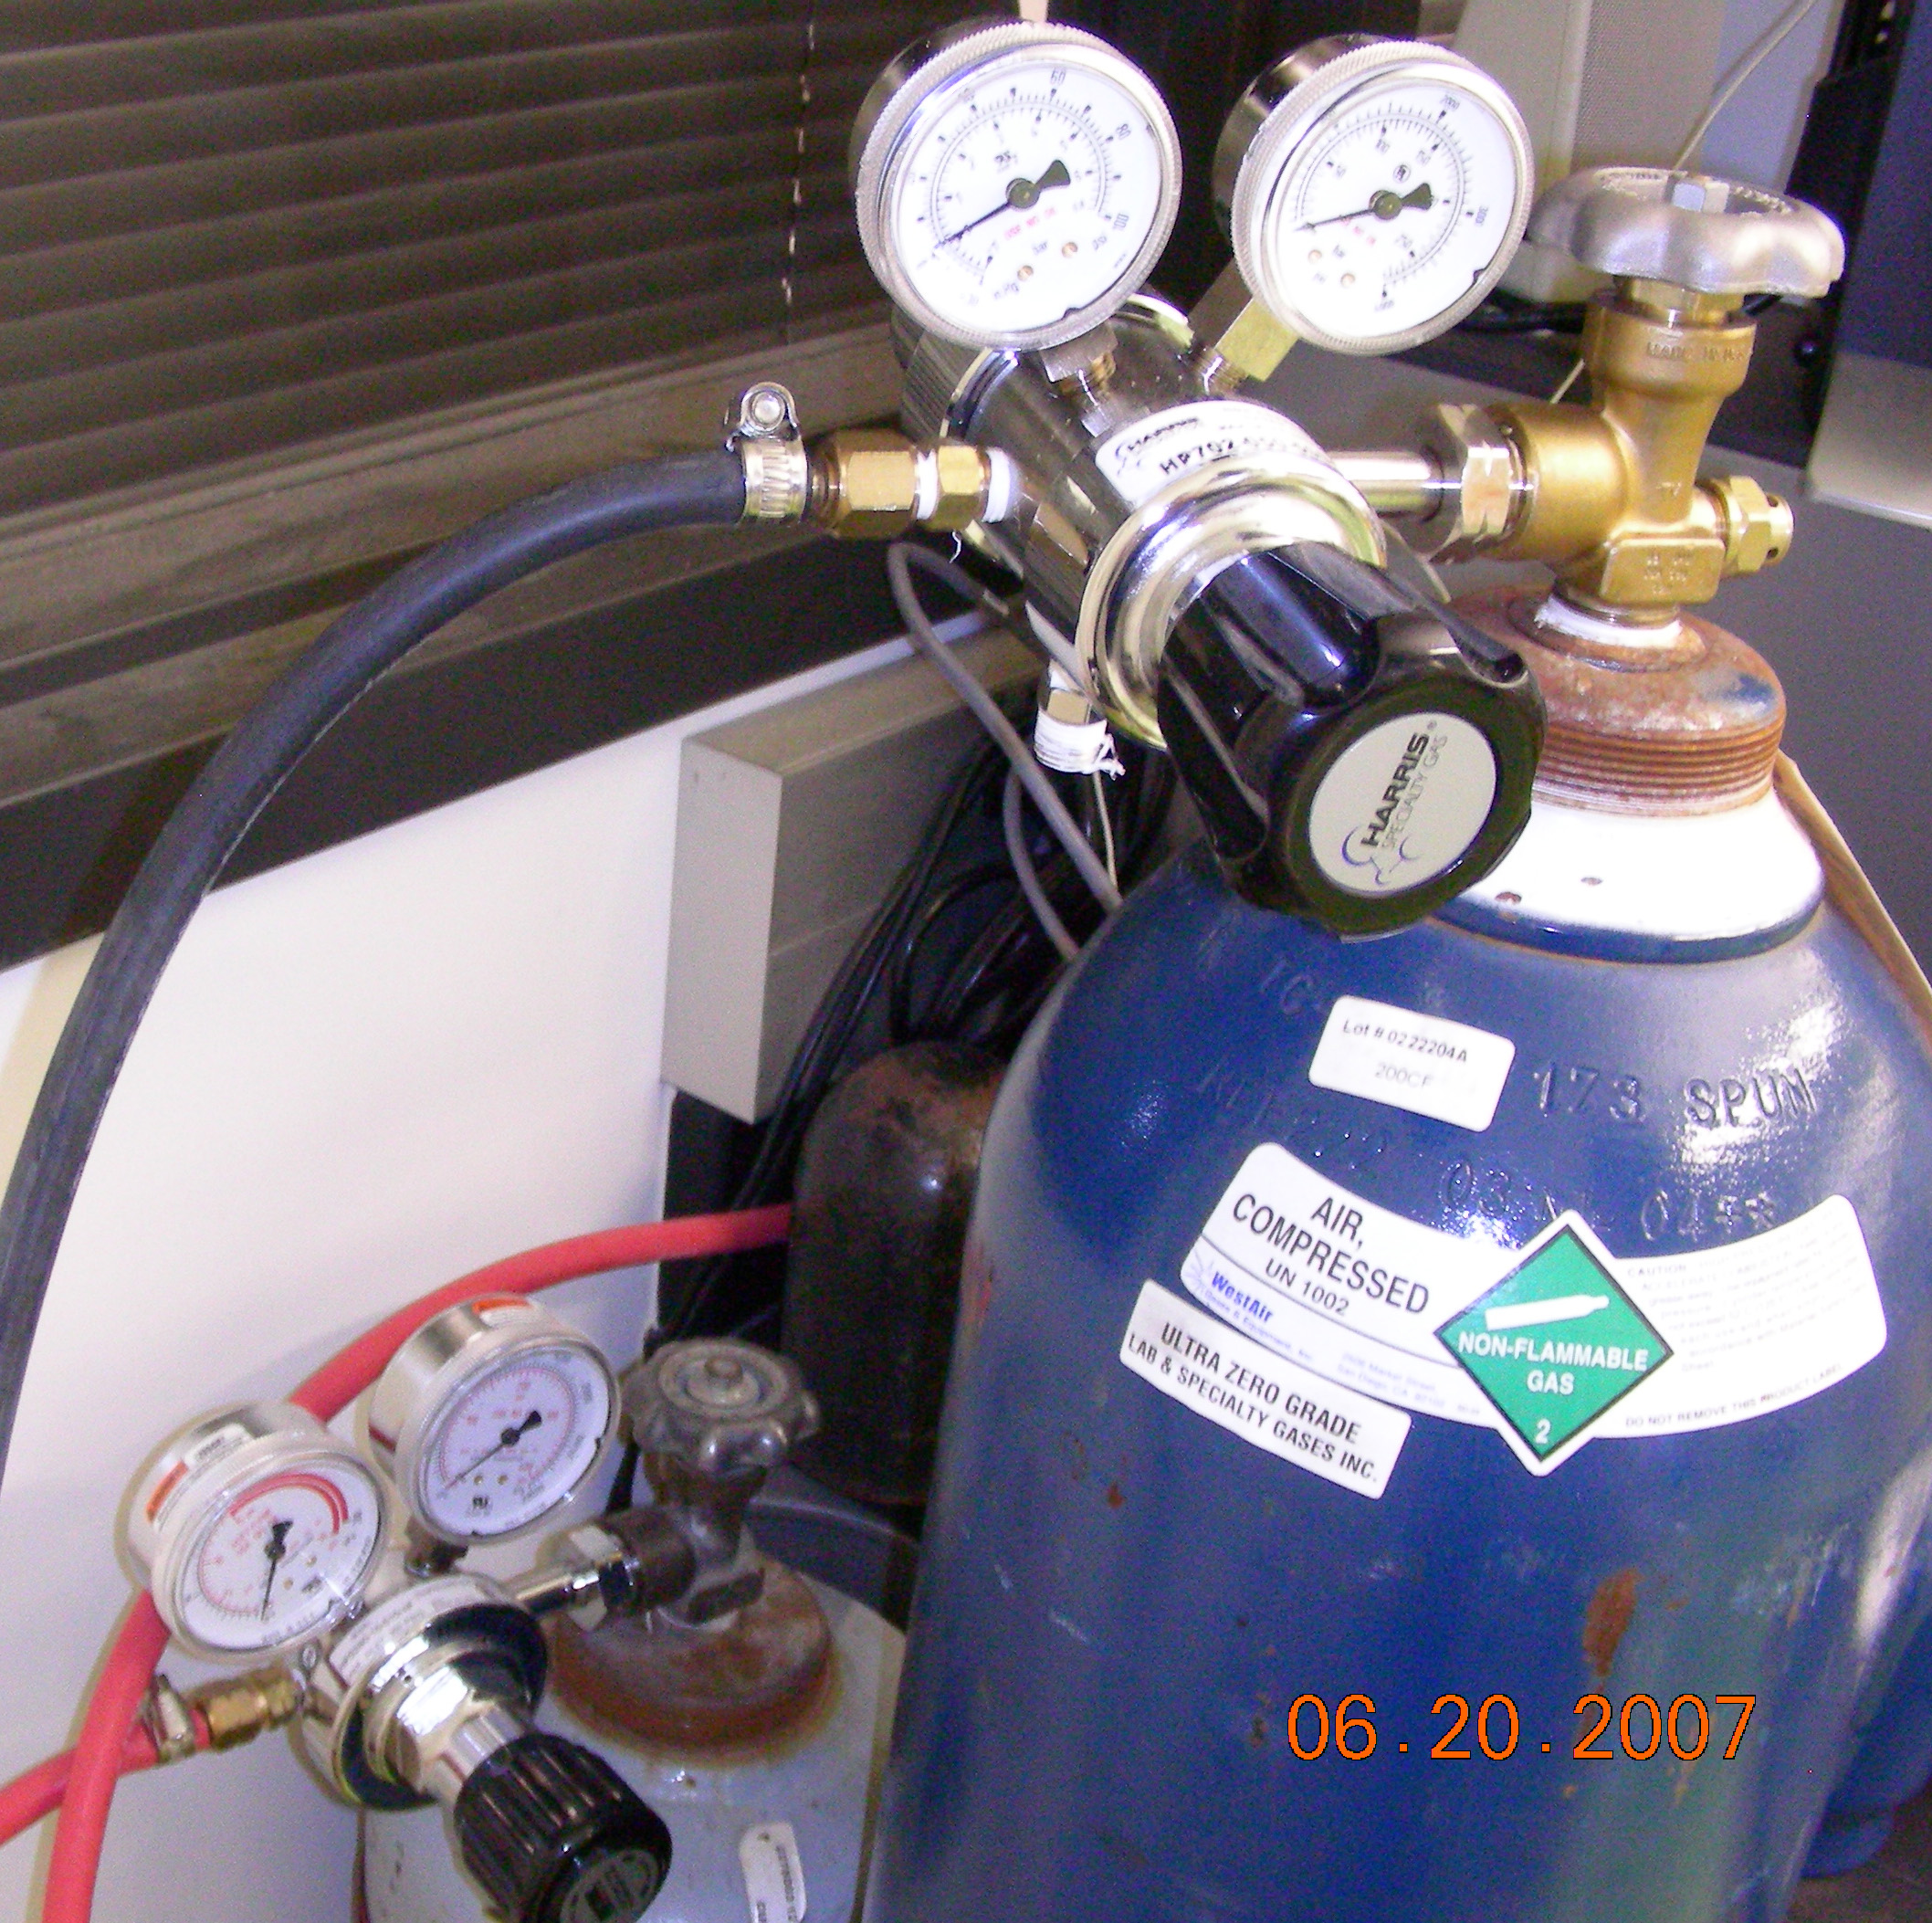
Gas settings
Turn on the the first stage valve on the oxygen and acetylene gas cylinder
(Note that the acetylene tank should not go below the 400 psi.
If the pressure is less than 400 psi, it is time to replace the cylinder)
Acetylene: Turn the second stage valve to 75 psi
Oxygen: Turn the second stage valve to 40 psi.
|
| |
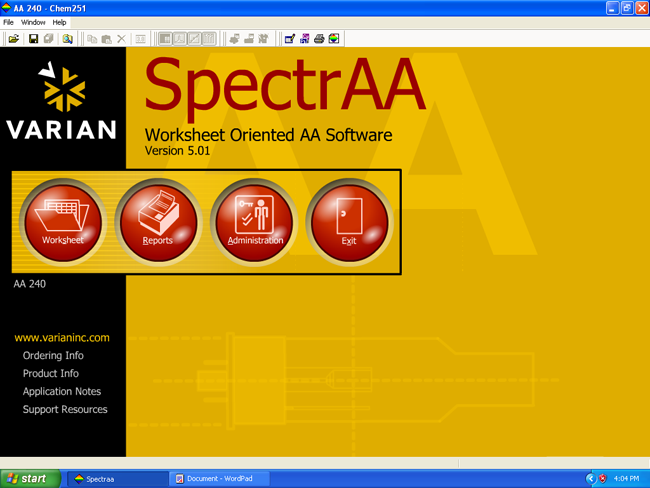
Opening Screen for Specta AA
On the opening screen, click on Spectra AA
Click on the Worksheet.
|
| |
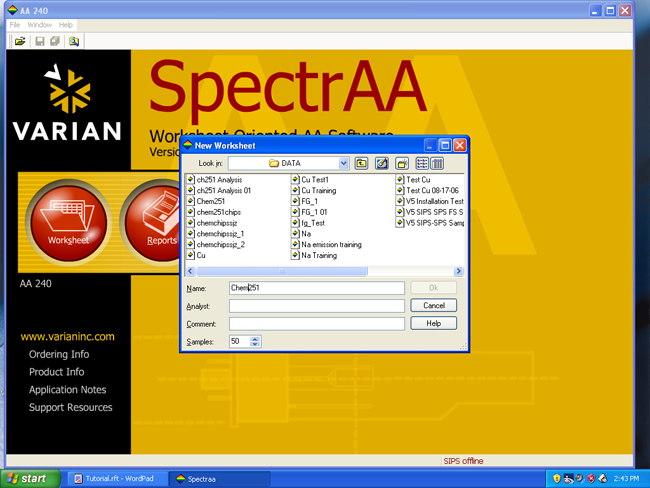
Worksheet Menu.
Click on worksheet (create new worksheet)
Click on New
Type in filename
|
| |
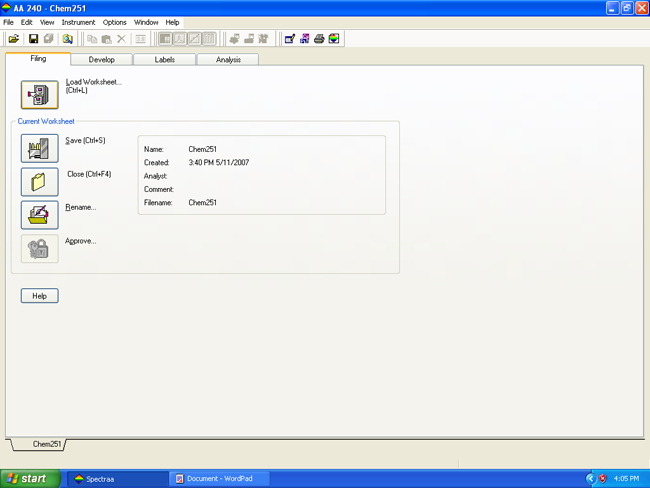
Worksheet → Filing
The opening menu after the worksheet is create opens under "filing"
Note the menu selection: Filing - Develop - Labels - Analysis
|
| |
Worksheet → Development → Methods
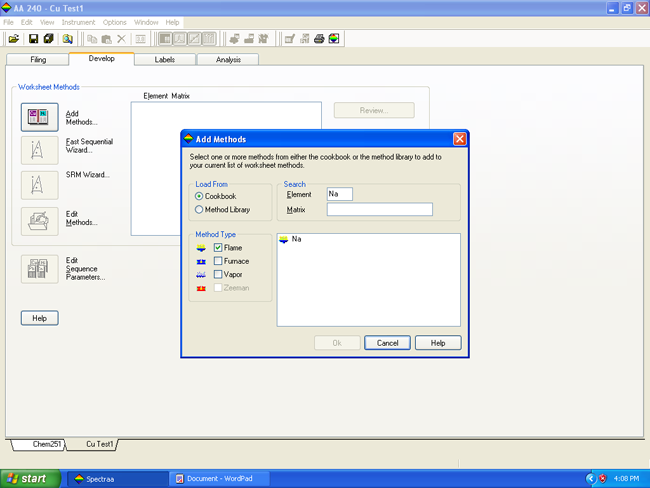
Click on the Develpment tab and choose add methods
Select Method Type: Flame
Element Selection: Sodium, Copper Calcium
(Choose: Na)
|
| |
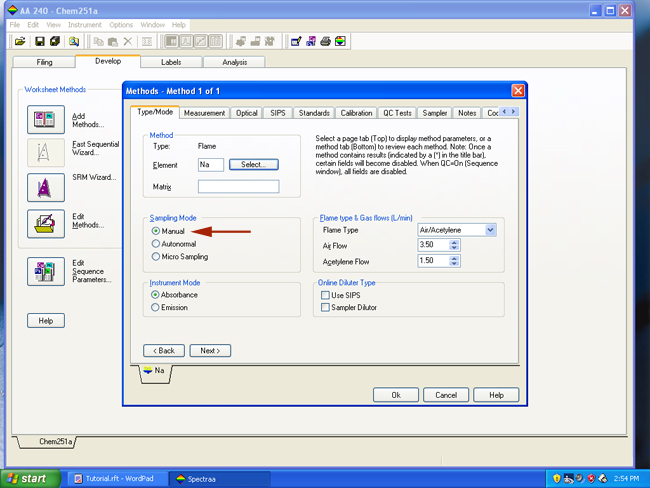
Worksheet → Development → TypeMode→ Manual
Select Sampling mode: Manual
|
| |
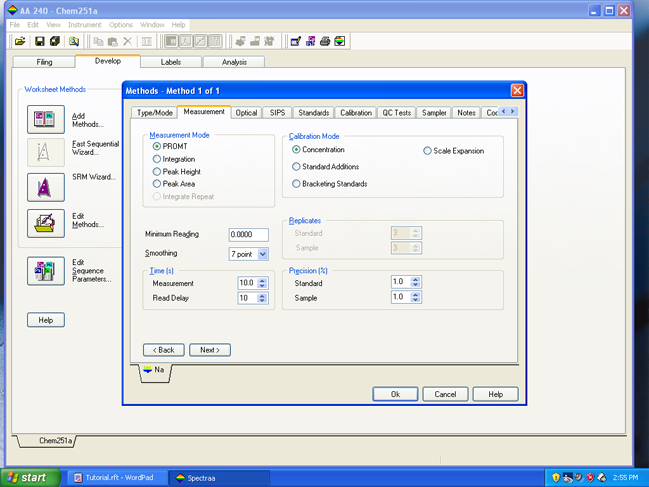
Worksheet → Development → Methods → Measure
Select Measure mode: Integration
Select Calculation mode: Concentration
|
| |
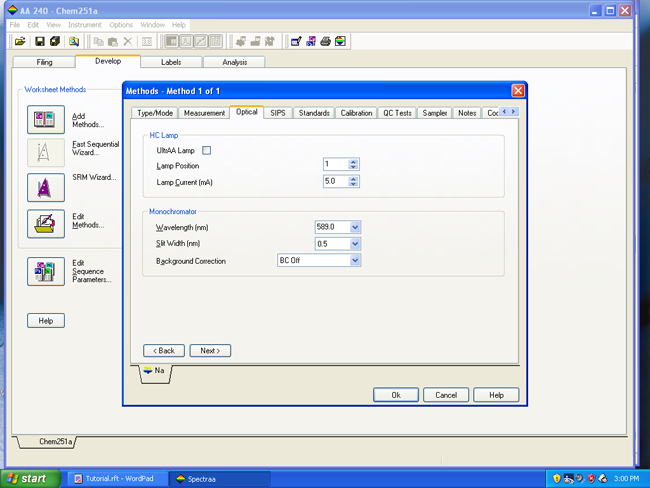
Worksheet → Development → Methods → Optical
The lamp position is set for the element selected automatically.
The wavelength is set for the linemax of the element source.
Selec the wavelenght that will be used from the lamp.
|
|
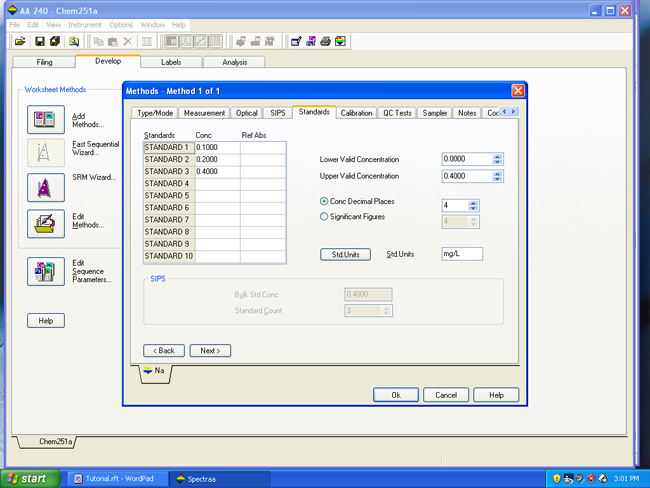
Worksheet → Development → Methods → Standards
Skp the SIPS tab (The Instrument does not have SIPS accessories)
The menu will show a list of standards.
This list can be use
to set up the calibration curve in a Beer-Lambert Analysis.
Concentrations are entered in the "Conc" column.
Enter the appropriate unist under "StdUnits" box.
|
|
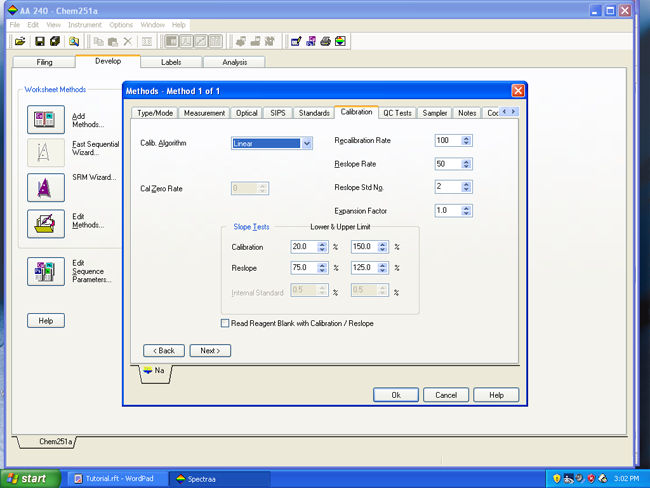
Worksheet → Development → Methods → Calibration
Choose the Calibration tab
Selecvt the Linear (Beer-Lambert) calibration algorithm.
|
|
Worksheet → Development → Methods
Skip the following tabs:
QC Tests
Sampler
Notes
Cookbook tab
Click on "OK" at the bottom
|
|
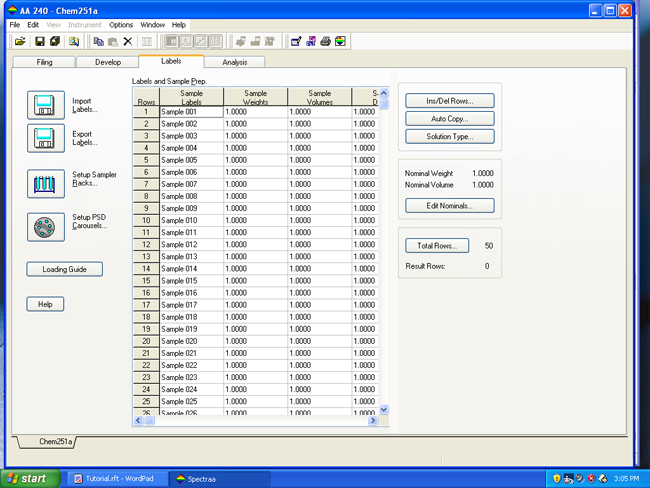
Worksheet → Labels
Select the Labels tab under worksheet.
The screen will show a list of samples to be analyze.
Choose the number of samples to be analyze (note these are not your standards).
|
|
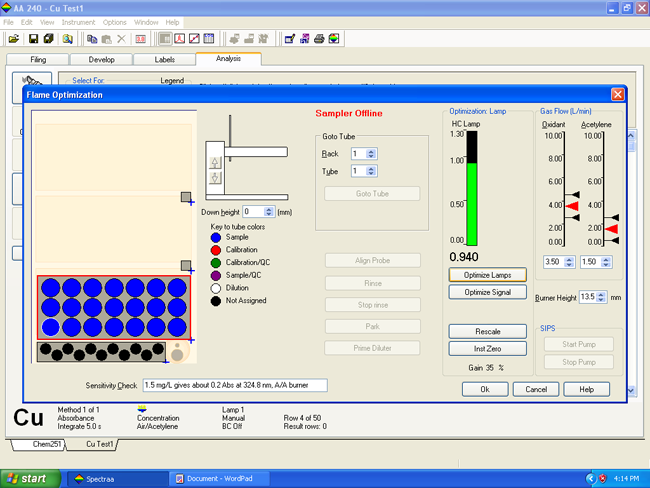
Worksheet → Analyze
Select the Analyze tab under worksheet.
Adjust the lamp to maximize the lamp.
Adjust the screws at the base of the lamp to maximize lamp signal.
|
|
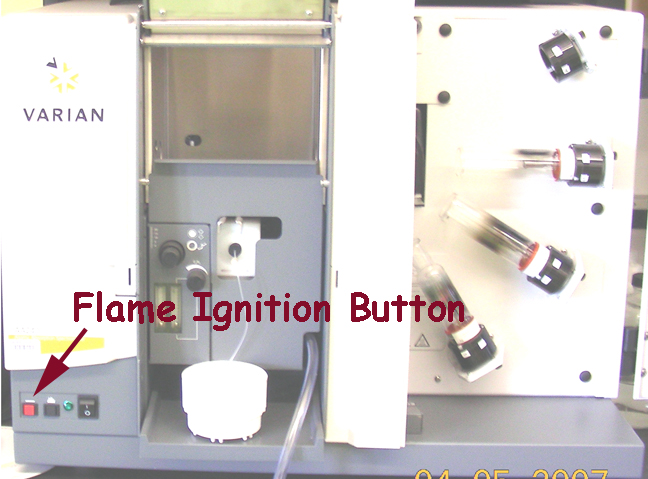
Worksheet → Analyze
(Turn on instrument Flame Switch)
|
|
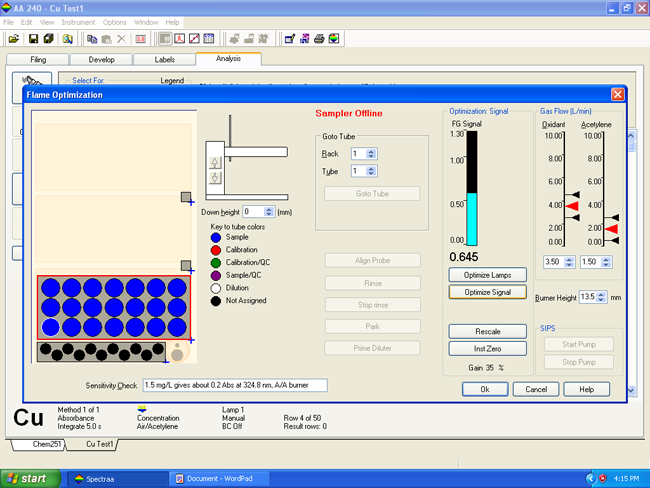
Worksheet → Analyze
Under the Analysis screen-
Adjust the flame to maximize the signal detected
Click on "OK" at the bottom of the screen.
|
|
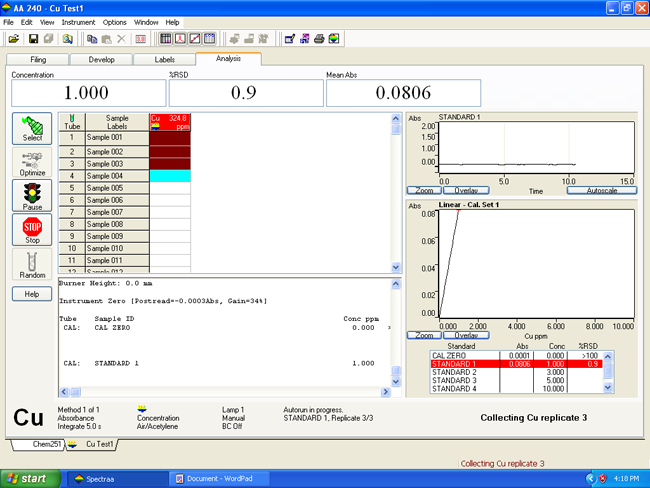
Worksheet → Analyze
Under the Analyze menu-
Click on select and select the standards and samples to analyze
Click on Analyze.
|
|
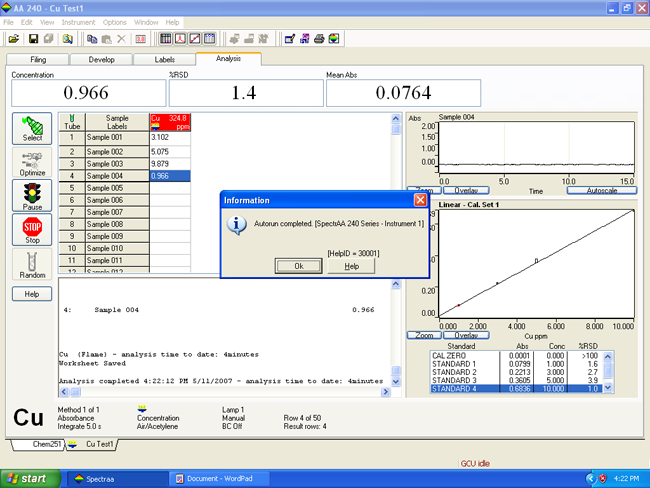
Worksheet → Analyze
The spectrometer will ask for standards and samples.
These values will be used to do a Beer-Lambert calculation
Upon completion of the experiment, the flame will be extinguished by the instrument
|
|
Processing the Data
Print the Results
Allow the instrument to cool down for 15 minutes then turn off the AA spectrometer.
Turn off the computers
Close the primary valve then the secondary valve for the acetylene and oxygen gas,
Turn off the ventilator fan
|
|
|
|
|
